nginx日志高级监控-基于Loki + Promtail + Grafana
官方文档
Loki: https://grafana.com/docs/loki/latest/
Grafana Loki V2 Dashboard for Nginx https://grafana.com/grafana/dashboards/12559?pg=dashboards&plcmt=featured-main
1、Loki + Promtail安装
Loki是个日志监控系统,可用来分析日志,并提供给Grafana进行图形化展示。
Promtail是个日志转发的代理,用于给Loki提供日志数据的。
loki + Promtail下载地址:在同一个版本下面,要下载相同版本
https://github.com/grafana/loki
下载解压
[root@centos dl]# ls
loki-linux-amd64.zip  promtail-linux-amd64.zip
[root@centos dl]# unzip loki-linux-amd64.zip
Archive:  loki-linux-amd64.zip
  inflating: loki-linux-amd64
[root@centos dl]# unzip promtail-linux-amd64.zip
Archive:  promtail-linux-amd64.zip
  inflating: promtail-linux-amd64
[root@centos dl]# ls
loki-linux-amd64  loki-linux-amd64.zip  promtail-linux-amd64  promtail-linux-amd64.zip
[root@centos dl]#
将解压后的loki和promtail但文件放在/data/ 目录下各自对应的目录
1.1 loki配置
将loki-linux-amd64改名为loki
[root@centos loki]# pwd
/data/loki
[root@centos loki]# ls
boltdb-shipper-active boltdb-shipper-cache chunks compactor loki loki-config.yaml nohup.out rules wal
[root@centos loki]# cat loki-config.yaml
auth_enabled: false
server:
http_listen_port: 3100
grpc_listen_port: 39095 #grpc监听端口,默认为9095
grpc_server_max_recv_msg_size: 15728640 #grpc最大接收消息值,默认4m
grpc_server_max_send_msg_size: 15728640 #grpc最大发送消息值,默认4m
ingester:
lifecycler:
address: 127.0.0.1 #IP地址,本机ip
ring:
kvstore:
store: inmemory
replication_factor: 1
final_sleep: 0s
chunk_idle_period: 5m
chunk_retain_period: 30s
max_transfer_retries: 0
max_chunk_age: 20m #一个timeseries块在内存中的最大持续时间。如果timeseries运行的时间超过此时间,则当前块将刷新到存储并创建一个新块
schema_config:
configs:
- from: 2018-04-15
store: boltdb
object_store: filesystem
schema: v11
index:
prefix: index_
period: 168h
storage_config:
boltdb:
directory: /data/loki/index
filesystem:
directory: /data/loki/chunks
limits_config:
enforce_metric_name: false
reject_old_samples: true
reject_old_samples_max_age: 168h
ingestion_rate_mb: 30 #修改每用户摄入速率限制,即每秒样本量,默认值为4M
ingestion_burst_size_mb: 15 #修改每用户摄入速率限制,即每秒样本量,默认值为6M
chunk_store_config:
max_look_back_period: 168h #回看日志行的最大时间,只适用于即时日志
table_manager:
retention_deletes_enabled: true #日志保留周期开关,默认为false
retention_period: 168h #日志保留周期
[root@centos loki]#
启动服务
[root@centos loki]# pwd
/data/loki
[root@centos loki]# nohup ./loki -config.file=loki-config.yaml &
1.2 Promtail配置
将promtail-linux-amd64改名为promtail
[root@centos promtail]# pwd
/data/promtail
[root@centos promtail]# ls
nohup.out promtail promtail-config.yaml
[root@centos promtail]# cat promtail-config.yaml
server:
http_listen_port: 9080
grpc_listen_port: 0
positions:
filename: /tmp/positions.yaml
clients:
#将日志推送到loki,ip写loki的ip
- url: http://172.20.20.161:3100/loki/api/v1/push
scrape_configs:
- job_name: nginx
pipeline_stages:
- replace:
expression: '(?:[0-9]{1,3}\.){3}([0-9]{1,3})'
#将ip尾号替换成***
replace: '***'
static_configs:
- targets:
- localhost
labels:
job: nginx_access_log
host: 20.162
agent: promtail
#推送的日志文件地址
__path__: /var/log/nginx/loki.log
[root@centos promtail]#
启动服务
[root@centos promtail]# pwd
/data/promtail
[root@centos promtail]# ls
nohup.out  promtail  promtail-config.yaml
[root@centos promtail]# nohup ./promtail --config.file=promtail-local-config.yaml &
2、nginx配置
修改nginx.conf文件,将日志格式改为json格式
log_format json_analytics escape=json '{'
    '"msec": "$msec", '
    '"connection": "$connection", '
    '"connection_requests": "$connection_requests", '
    '"pid": "$pid", '
    '"request_id": "$request_id", '
    '"request_length": "$request_length", '
    '"remote_addr": "$remote_addr", '
    '"remote_user": "$remote_user", '
    '"remote_port": "$remote_port", '
    '"time_local": "$time_local", '
    '"time_iso8601": "$time_iso8601", '
    '"request": "$request", '
    '"request_uri": "$request_uri", '
    '"args": "$args", '
    '"status": "$status", '
    '"body_bytes_sent": "$body_bytes_sent", '
    '"bytes_sent": "$bytes_sent", '
    '"http_referer": "$http_referer", '
    '"http_user_agent": "$http_user_agent", '
    '"http_x_forwarded_for": "$http_x_forwarded_for", '
    '"http_host": "$http_host", '
    '"server_name": "$server_name", '
    '"request_time": "$request_time", '
    '"upstream": "$upstream_addr", '
    '"upstream_connect_time": "$upstream_connect_time", '
    '"upstream_header_time": "$upstream_header_time", '
    '"upstream_response_time": "$upstream_response_time", '
    '"upstream_response_length": "$upstream_response_length", '
    '"upstream_cache_status": "$upstream_cache_status", '
    '"ssl_protocol": "$ssl_protocol", '
    '"ssl_cipher": "$ssl_cipher", '
    '"scheme": "$scheme", '
    '"request_method": "$request_method", '
    '"server_protocol": "$server_protocol", '
    '"pipe": "$pipe", '
    '"gzip_ratio": "$gzip_ratio", '
    '"http_cf_ray": "$http_cf_ray",'
    #如果没有geo模块可以注释掉
    #'"geoip_country_code": "$geoip_country_code"'
 '}';

access_log logs/access.log json_analytics;
也可以配置在子站点,这里以子站点为例
[root@centos conf]# cat conf.d/loki.conf
server{
    listen 80;
    server_name www.loki.cc loki.cc;

    add_header country $geoip2_country_code;
    if ($allowed_country = no) {
        return 403;
    }
    location / {
        root /data/html/loki;
        index index.html;
    }
    access_log  /var/log/nginx/loki.log json_analytics;
}
[root@centos conf]#
这里配置的子站点日志保存在/var/log/nginx/loki.log,所以在promtail配置中也要填写这个地址
3、安装配置grafana
grafana下载地址,本例以8.5版本为例,下载rpm包
https://github.com/grafana/grafana/releases/tag/v8.5.10
安装省略了,rpm直接装,启动服务
[root@centos ~]# systemctl start grafana-server
[root@centos ~]# netstat -tunlap| grep grafana
tcp6       0      0 :::3000                 :::*                    LISTEN      111295/grafana-serv
tcp6       0      0 172.20.20.162:3000      172.20.10.33:63871      ESTABLISHED 111295/grafana-serv
[root@centos ~]#
用浏览器打开3000端口,默认用户名密码都是admin,首次登录要求改密码
添加数据源
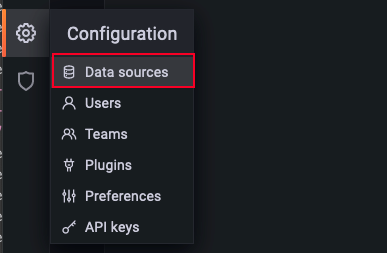
找到loki
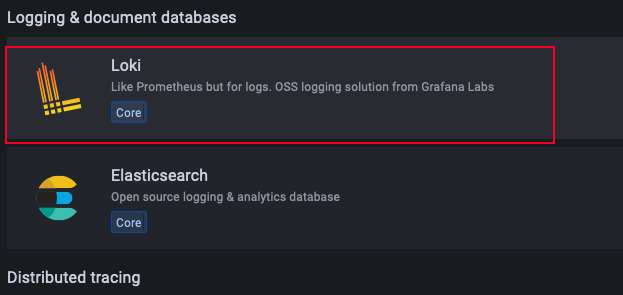
输入loki地址,然后点最下面的保存
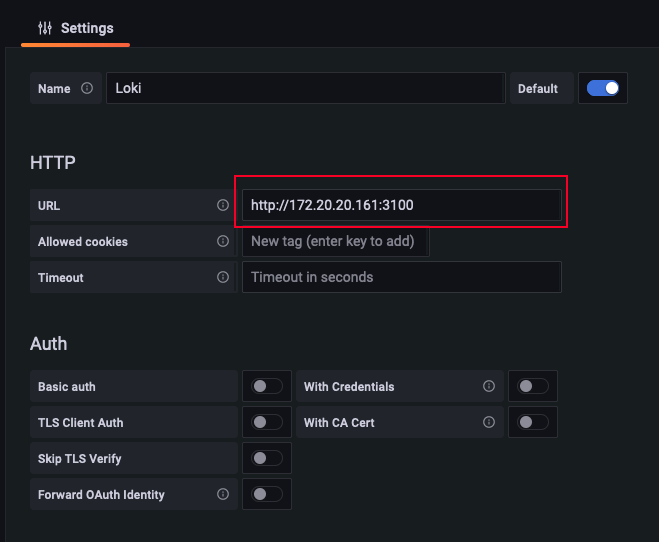
下步导入监控模版
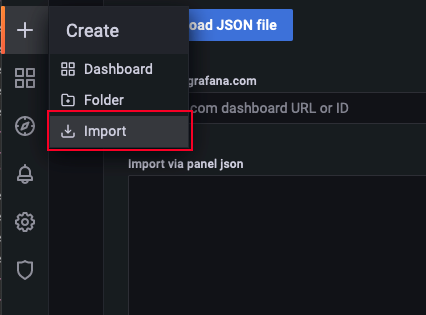
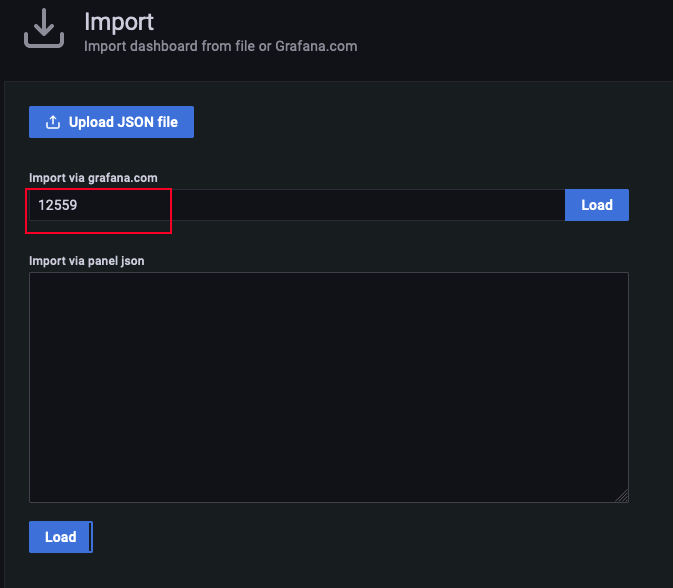
模版编号12559,直接输入编号再点后面的按钮就可以导入了
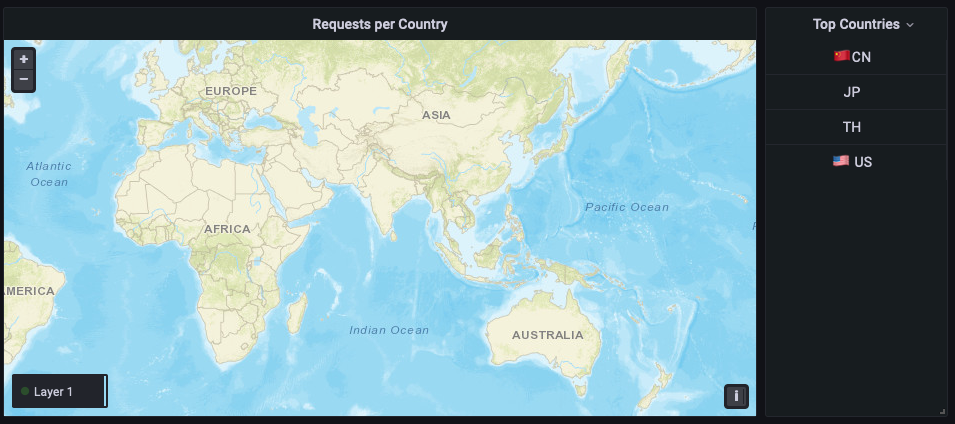
导入完成就是这样的
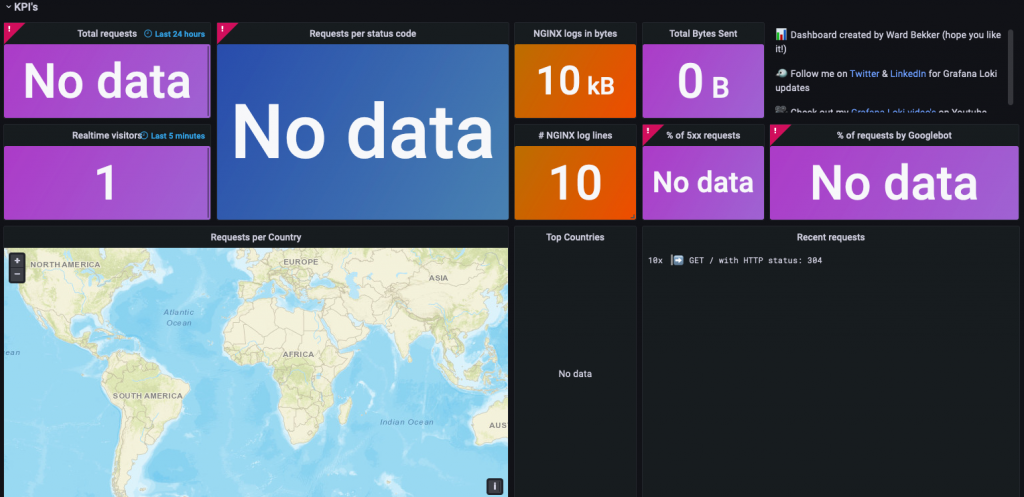
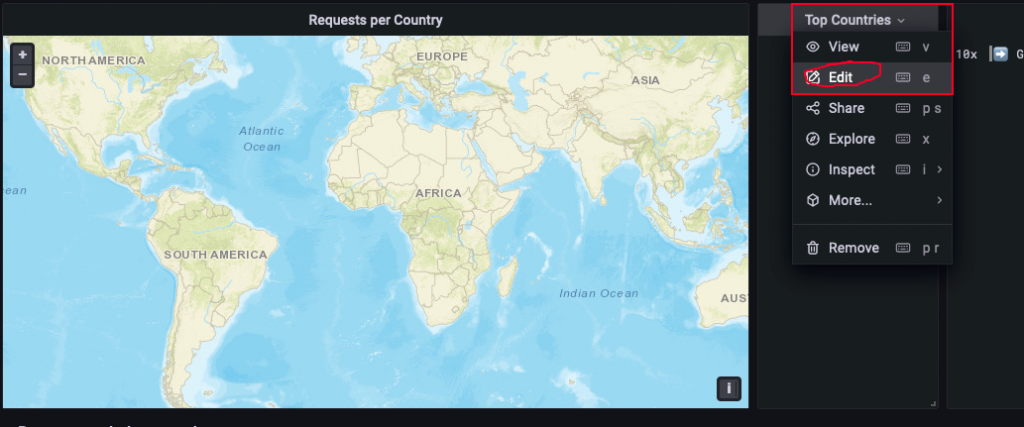
出现No data可能是日志中没有数据,下面配置一下地图数据,因为这里使用的geoip2版本,所以要改一下变量名称
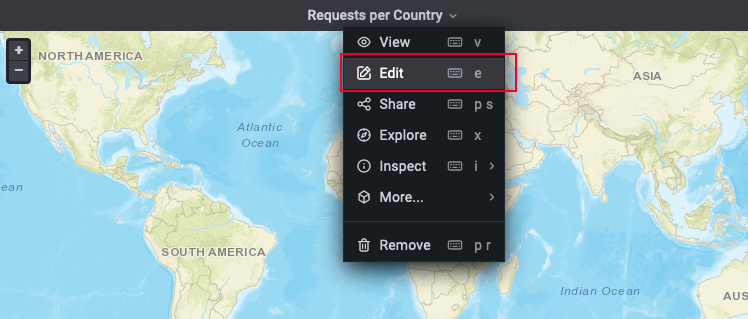
geoip_country_code改为geoip2_country_code,两个变量都要改

获取国家代码的配置也要修改
同样geoip_country_code改为geoip2_country_code,两个变量都要改

修改完要点右上角的保存
如果是内网测试地理位置是获取不到的,可以通过nginx的日志来查看是否有获取国家代码

国家代码为空,可以通过修改日志内容来测试显示效果
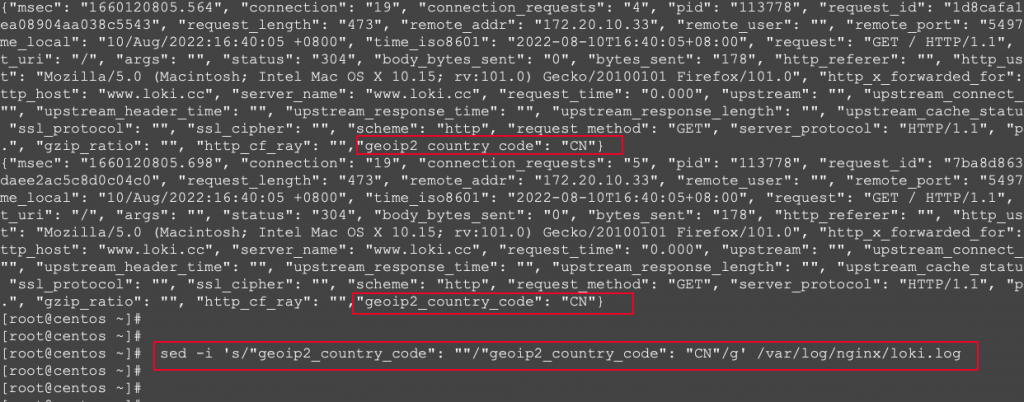
将国家代码改为CN